Sunday, 16 September 2012

Plum Gingerbread Muffins

Fall, as I've mentioned, is my favourite of all seasons. I love that crispness in the air and the smell of dry leaves - it makes me want to throw on my coziest jumper and spend the day outside, preferably punctuated (frequently) with cups of tea and cinnamon-y spiced biscuits :) 
In Canada this season is usually accompanied by bright, chilly sunshine and pumpkin spice lattes from Starbucks, but Swansea often lacks the former and has yet to discover the joys of the latter, so I've learned to appreciate different things about fall since moving here. Like blustery walks along the coast (you definitely can't get those in Alberta!) and seeing the first autumn produce from the green grocers. This weekend I discovered that plum season has arrived! There were some gorgeous plums at the green grocer's this weekend and I bought a big bag before I had fully thought through how to use them.

The idea of plum muffins cropped up when I started thinking about my lunches for the week. I'm always trying to find grab-and-go type things for lunch, you see, because I'm usually running late in the morning and I lack the discipline to put anything together the night before. So being able to grab a couple muffins, some carrot sticks and a piece of fruit seemed like a great plan. They had to be filling though, and stay moist enough that the batch I made today would keep for a few days (I'll freeze the rest and defrost them as needed), so gingerbread and plum seemed a good match!

The problem with muffins is that they're usually ridiculously unhealthy, and if they're good muffins, they tend to be even moreso, as you can never eat just one. So I spent some time trying to figure out what I could substitute to make these at least slightly less guilt-inducing, and I think I've been successful (no joke - these, by my calculations, are 2 Weight Watchers points each (if you make the same quantity I did), which, if you know anything about WW, is fantastic)! I'm usually skeptical of some of the healthy substitutions, as they can sometimes sacrifice taste for nutrition, but I think these are alright (but you'll have to let me know if you agree)...

One thing to note is that this is a really wet batter, and could be even wetter if you use over-ripe plums, runnier yogurt than I used, etc. That said, if you think your batter is too runny, add more oats. I added more oats to the batter after the second batch went in the oven because some of the muffins were sinking a bit in the centre, and that did the trick. So these proportions should work, but do use your own judgement as to appropriate degree of runniness! Good luck!

Plum Gingerbread Muffins
215 g packed dark brown sugar
220 g plain flour
75 g porridge oats
1 1/2 tsp baking soda
1 tsp cinnamon
1 tsp ground ginger
1/4 tsp ground nutmeg
1/4 tsp ground cloves
1/4 tsp ground cardamom
1/4 tsp allspice
1/2 tsp salt
1 egg
60 mL (1/4 US c.) black treacle
60 mL (1/4 US c.) runny honey
250 mL (1 US c.) buttermilk*
29 mL low fat natural yogurt
56 g unsalted butter
5 plums, pitted and diced

Preheat oven to 350F/180C and grease/line a muffin tin.

Over low heat, combine the treacle, honey and butter. Stir to combine.

Combine all dry ingredients in a large bowl and stir well. Add diced plums to dry ingredients and mix until plums are well coated.

In a separate bowl, mix the buttermilk, yogurt and egg. Combine the wet and dry ingredients and stir until just combined. If you think the batter is too runny, add a couple tbsp of oats and stir well.

Fill muffin cups 2/3 full and bake for 25 minutes in preheated oven, until a knife inserted in the centre of a muffin comes out clean.

This recipe is supposed to (according to the original source, pre-adaptations) to make 12 muffins...presumably American muffins, because I managed to get 34 (hence the need for freezing!). But they are dense and gingerbready and nicely moist.

*If you don't have/can't be bothered to get buttermilk, just use any milk you have and add a tsp of lemon juice to it. The lemon juice will curdle the milk and produces the same effect as the buttermilk.

Saturday, 8 September 2012

Food Gifts

Amongst other things, my recent appendix debacle was a not-so-subtle reminder that I have great, great friends :) I think I only told a few people what was happening (of all the weeks, it would happen when I was supposed to bake the cake for a going away party and spend a pleasant weekend in Wootton Bassett learning how to paddle board! So plans obviously had to be cancelled), but I had get well texts, phone calls and visits the whole time I was in the hospital. It helped so much to stave off the anxiety I was pretending not to feel about everything, as well the inevitable boredom and loneliness that comes with spending a few nights in hospital. The friend network is a great and underrated thing...

Since getting out of the hospital I've had a bit of spare time on my hands, and, as usual, my mind has turned to food. Specifically, what food I could make to say thank you to a couple of friends who I don't think I could have managed without during this whole thing. I'd originally decided on a battenberg - I have a great battenberg recipe, it travels well, and it's pretty enough to be a nice gift - and then today I came back from buying the ground almonds and eggs for the marzipan only to discover that, for the first time in my life, I have run out of icing sugar.

So no battenberg.

Then I stumbled across this while looking for alternate food gifts: lavender sugar! As a lover of all things lavender, I bookmarked this immediately. And then, following a thought process I myself still do not understand, I was making shortbread and sprinkling it with the lavender sugar as it came out of the oven.

Shortbread is incredibly easy to make, and homemade shortbread is so much nicer than store bought. The lavender sugar is surprisingly nice on it - not at all overwhelming, but giving it just that slight bit extra that makes shortbread so dangerous :)


So - no healthy food post, but maybe give this a try next time you're looking for a food gift.

Lavender Sugar
2 tsp dried lavender flowers*
200 g caster sugar

Mix the lavender flowers and sugar in a jar and shake well. The sugar will keep nicely for about 2 months, so unless you know you're going to use lots of it, I'd stick to small quantities.

* Dried lavender can, perhaps unsurprisingly, be bought quite cheaply from amazon, in case you're having a hard time finding it!

Shortbread
260 g plain flour
100 g caster sugar
40 g corn flour
pinch of sea salt
200 g unsalted butter, chilled and diced

Lavender (or plain, of course!) sugar for sprinkling

Preheat the oven to 180 C / 350 F and line a 9 or 10" springform pan with parchment paper.

Mix flour, sugar, corn flour and sea salt together in a bowl. Stir well, making sure to break up any lumps.

Add the butter to the bowl and use your fingers to the rub the butter into the dry ingredients until the mix resembles breadcrumbs. Tip the mix into the prepared pan and use a spoon to press into an even layer. Prick the dough all over with a fork and score lightly into 8 - 12 pieces.

Bake for 25 minutes, until lightly browned and firm to the touch.

As soon as the shortbread comes out of the oven, sprinkle liberally with the lavender sugar and cut along the scored lines into pieces. Leave in the tin to cool completely before storing in an airtight container.


Friday, 31 August 2012

Summer Wrap-Up

I have no idea where the time went, but somehow it's September tomorrow! I just realized how long it's been since I updated, and since I happen to have some time on my hands (I'm currently recovering from a fairly unpleasant bout of appendicitis) I thought a little summer wrap-up post was in order.

Despite the weather being rather appalling this summer, I've been able to do some fantastic things! July started off amazingly, with a tour of the Harry Potter Studios in Watford, with my friend Angie. I don't think - well, no, I know - I couldn't have done that tour with anyone other than her. Our enthusiasm for all things Potter is equal, and far exceeds that of any of my other friends :) So we had a fantastic time geeking out while wandering around the studio, and seeing the props and the costumes and the sets from all the films.


I was also lucky enough to get tickets to the Olympics this summer, and while we weren't sure how much fun the actual sporting event was going to be (our tickets were for table tennis, so we did not have high hopes!) we ended up having an amazing time! And table tennis was way more fun than we expected. Also, it was just fantastic to see London that way - everyone was super friendly, flag-capes from all over the world were all over the city, and the atmosphere was just so welcoming and fun. So it was really nice to feel part of that for a day. It didn't hurt that the team I cheered for won, either :)


Then, earlier this month, some friends and I went hiking in the Brecon Beacons - a national park not far from here. I haven't had the chance to explore Brecon Beacons since arriving here, but I keep hearing such amazing things, and it didn't disappoint! Wales is such a beautiful country, and I tend to think about the beaches near me when I think about Wales, but the hills and inland landscape are equally gorgeous. Just getting out and seeing all of that was such a great way to spend a Saturday. We ended up hiking 8.5 miles that day - perfect day :)


I'm going to try to start posting more in September...maybe even on a regular basis...I've been inspired food-wise by the Hairy Bikers lately, so I'm going to try to make some interesting and 'normal' healthy food. We'll see how it goes! And, for the moment there aren't any more trips planned (unless you count Milton Keynes for a workshop, and somehow that doesn't do it for me...) so I'm probably going to be posting mostly food things...hope that's alright!

Monday, 25 June 2012

Pleasant Weekends

I'm back! It's been ages, I know, but this weekend was so pleasant that I had to write about it :)

I know this is a completely obvious statement, and I am not unique in this way at all, but I really love weekends. Time to sleep in a bit, read, get to the farmer's market or the green grocers, do some baking, go for a walk...all great, great things! This weekend I even managed to get in some surfing (I am so bad, but it is so much fun!) AND the sun made an appearance, so I headed out to Rhossili on Sunday afternoon and spent some time at the beach. It was absolutely perfect :)

As for this weekend's cooking, I've been trying really hard lately to watch what I eat and keep track of how much I'm consuming, in my efforts to stop eating like 10 grown men and to start eating like a normal single female. I'm not going to lie, it's been difficult! But I love finding recipes that provide good food and are actually fun to make. Especially right now, when there's so much great and reasonably local produce available, it's a great time to be cooking! So this weekend I made ratatouille and Scandinavian Rye bread, both of which will be dinner for the week. In my efforts to create a balanced meal, I added lentils to the ratatouille for protein (I'm a weekday vegetarian, as I'm too lazy and cheap to cook meat every night). If you aren't as lazy as me, and do cook meat regularly, I think the ratatouille (minus the lentils) would go really well with grilled or roasted chicken, lamb or sausage - it's fairly versatile, really, since it's basically vegetable stew!


Ratatouille
2 tbsp olive oil
3 medium onions, roughly chopped
3 - 4 cloves garlic, smashed and roughly chopped
1 medium aubergine (eggplant), quartered and roughly chopped
2 medium courgettes (zucchini), quartered and roughly chopped
1 large red pepper, roughly chopped
1 large yellow pepper, roughly chopped
4 - 5 large, ripe tomatoes, roughly chopped
3 sprigs fresh thyme, leaves only
Sea salt and ground black pepper
5 - 6 mushrooms, roughly chopped (optional)
150 g lentils, soaked (if dried) or canned and drained (optional)

1. Heat the olive oil over low - medium heat in a large pot and add the onions, stirring occasionally for 5 - 7 minutes, until onions are soft and transluscent. Add the garlic and cook for an additional minute.

2. Add the rest of the vegetables all at once and give it all a good stir. Turn the heat down to low and simmer for at least 45 minutes, until all the vegetables are soft and melty.

**If you have time and the desire, you can also roast the vegetables before combining them into the pot to stew - this will allow individual flavours to come through a bit more, but it's entirely up to you!


Scandinavian Rye Bread
175 mL whole milk
175 mL water
2 tbsp soft dark brown sugar
7 g active dried yeast (1 pkg)
250 g rye flour
200 g strong white bread flour
2 tsp fine sea salt
2 tsp caraway seeds

1. Combine milk, water and sugar in a small saucepan and heat, stirring continuously, until the sugar is dissolved and the mixture is lukewarm. Remove pan from heat, add the yeast and let sit for 10 minutes, until foamy.

2. In a large bowl, combine rye flour, white flour, salt and caraway seeds. Form a well in the centre, and add the yeast mixture. Stir until all the liquid is incorporated, and then tip out onto a lightly floured surface.

3. Knead for about 10 minutes, until the dough is soft and consistent in texture, but not sticky. Lightly oil the bowl and return the bread to the bowl, turning once to coat. Lightly oil some clingfilm/plastic wrap and cover the bowl and let stand in a warm, draught-free place for 90 minutes, or until the dough has doubled in size. *If, like me, you have no warm draught-free spaces in your house, you can also preheat your oven to 150F, then turn the oven off and put the bowl in there instead. I've had much more success with dough rising since I started doing this! Just make sure the bowl is heatproof, and maybe use aluminium foil instead of clingfilm.

4. Once the dough has risen, knock it back with your knuckles a bit before tipping it out onto a lightly floured surface and kneading briefly. Shape the dough into a round and place on a greased cookie sheet (or greased parchment paper). Deeply score the dough 3 times, then cover in clingfilm and let stand for another 45 - 50 minutes (or until doubled in size).

5. Once the dough has risen again, bake in a preheated oven at 180C/350F for 35 - 40 minutes. You'll know it's finished when the bottom of the loaf sounds hollow when it's tapped. Let the dough cool for about 20 minutes before slicing.

Monday, 12 March 2012

10k Training Schedule


The Forest of Dean 10k is in just over 2 months! YIKES!! It's not like I haven't been running, I have, but not nearly enough, and I definitely haven't been pushing myself very hard. Clearly this needs to change if I stand a chance of finishing the 10k, let alone achieving my hoped for time of 60 minutes. That'll be difficult enough already!

So - in light of this realization, I've found a training plan that will hopefully work. I have a training buddy for at least one run a week, probably two, so that would just leave one for me to be self-disciplined about. Totally doable...(right?)


Here's the plan:

  Monday Tuesday Wednesday Thursday Friday Saturday  Sunday
Week 1 REST 2M easy, then 4x400m, with 400m or 3 min jog recoveries, then 2M easy REST REST REST 2 - 2.5M easy, 2M faster, jog to finish 2-3M easy


Week 2 REST 2M easy, then 4x600m or 2 min, with 400m or 3 min jog recoveries, then 2M easy REST REST REST 15 min easy, 15 min fast but controlled, jog to finish 3-4M easy


Week 3 REST 2 - 2.5M easy, then 4x800m or 3 min, with 400m or 3 - 4 min jog recoveries, then 2M easy REST REST REST 30-40 min relaxed, inc hills 4-6M easy


Week 4 REST 2M easy, then 8x400m or 70 -80s, with 400m or 3 min recoveries, then 2M easy REST REST REST 5M, first half at 70%, second at 85% 5-7M easy


Week 5 REST 2M easy, then 8x500m or 90-100s, with 400m or 3 min recoveries, then 2M easy REST REST REST 35-45 min fartlek, with varied efforts and recoveries 6-7M easy


Week 6 REST 2 - 2.5M easy, then 5x800m or 3 min, with 400m or 3 min jog recoveries, then 2 - 2.5M easy REST REST REST 6 -7.5M gradual acceleration in 2.5M segments, ie 70%, 80%, 90%.  7-9M easy


Week 7 REST 2-3M easy, then 10x400m or 70-80s, then 400m or 2 -3 min jog recoveries, then 2 - 3M easy REST REST REST Warm up, then 4 x 1M or 5 - 5.6 min, with 3 -4 min recoveries, then cool down 7-9M easy


Week 8 REST 2 - 3M easy, then 5 -6 x 500m or 90 - 100s, with 400m or 2-3min jog recoveries, then 2-3M easy REST 4-5M easy REST REST RACE


I'm not deluding myself - this is going to be difficult. But I have to start somewhere, right?


It helps that this is along my running route :)


Sunday, 11 March 2012

Russian Honey Cake


Our department secretary retired this week, and we had a retirement lunch for her on Friday. It took me ages to decide what kind of cake to make for the occasion, because I've noticed that not everyone in the department loves chocolate cake, and someone else had said they'd bring a coffee and walnut cake just in case a lot of people showed up. So, rather than go with perhaps the more traditional option of a Victoria Sponge (which would have been great, but a bit predictable, in my opinion), I found this on 'Time To Cook', a food blog from one of the bakers from 'The Great British Bake-Off' (such a great show!). I was intrigued by the idea of baking a really dry sponge and having it soak up the moisture from the cream filling, and Mary Anne said that a slight caramel flavour comes through as the cake slurps up the creme-fraiche. I was not disappointed! Not only was the cake relatively easy to make, it looked fantastic and everyone loved it! It's definitely more light and delicate than rich and dense, so it's a good option to bring along when not everyone is all for the Death By Chocolate-type recipes. This recipe is a combination of Mary Anne's and some others I found online during my hunting, so I'll just give you mine. Enjoy! Ooh - and google pictures of Russian Honey Cakes! Some people can make them with 15 super thin layers! I don't know how they do it, since I had enough with 6, but it would be worth trying.
Russian Honey Cake
3 large eggs
225 g caster sugar
100 g unsalted butter
3 Tbsp honey (either stiff or runny honey is fine)
1 tsp baking soda
500 g plain flour

1 L creme fraiche
4 Tbsp icing sugar
splash vanilla extract

1. Melt honey and butter in a bowl over a pan of simmering water. Add caster sugar and eggs, whisking constantly until mixture is smooth and sugar has dissolved. 

2. Add baking soda and whisk for another minute until thoroughly combined.

3. Remove bowl from heat and add flour in batches, stirring well between additions. The dough will become somewhat stiff, either like a putty or a soft rolling dough. Divide dough into 3 to 4 equal portions (you want the dough to be spread thinly in the tin, but the number of portions will depend on the size of your pan and on how many layers you want, so you'll end up figuring this bit out for yourself).

4. Preheat your oven to 180C/350F. Grease and line a baking sheet with parchment paper. Spoon in one dough portion and spread it to the edges of the pan. You may find that frequently wetting a silicone spatula and pressing the dough into the pan works best.


5. Bake in the preheated oven for 4 to 5 minutes, or until the sponge is evenly golden brown and stiff to the touch. Let cool for a minute or two (until it's not too hot to touch).

6. Turn the parchment and sponge onto a cooling rack and peel the paper from the cake. Replace the parchment in the pan and spoon in the second batch of dough, pressing to the corners. Repeat steps 4 through 6 until all dough has been baked.


7. Stack the sheets of sponge and cut to desired size. I cut mine in half lengthwise and made 6 layers. Trim all the edges so every sheet is equal; reserve the trimmings.


8. Mix the creme fraiche with the icing sugar and a splash of vanilla until smooth. You want the creme fraiche to be sweet but still to have that tangy bite to it.

9. Lay one sheet on the serving dish and fit 4 strips of foil around the edges to catch any dripping cream. Spread a thick layer of cream over the first layer (be generous - the cake is going to absorb a lot of it!), then lay another layer of sponge over the cream. Continue alternating between sponge and generous cream layers, and finish off by covering the top, sides and ends. 


10. Crush the sponge trimmings in a food processor or by hand. And this next bit is up to you - the other recipe I was using sieved the sponge crumbs over the top of the cake, and it looked very pretty. But I didn't love the sides of mine, mostly because I hadn't kept enough cream back to cover the sides and ends evenly, so I went with Mary Anne's suggestion and pressed the crumbs onto the sides and left the top clear.


11. Once you've finished adding the crumbs, carefully pull the foil strips away from the base, removing all the left over crumbs and dripped cream.
 

12. Et voila! Now cover and leave the cake in a cool place to set and absorb all the creamy goodness for at least 12 hours. I made mine the day before, so it sat for 24 hours, but it was fine - not too soggy or anything. All together, I think the cake took about 1 1/2 hours to make, so it's definitely doable in an evening.

Tuesday, 6 March 2012

Baking Machine

There's nothing like being without a kitchen for a while to make you appreciate cooking for yourself, and over the past week I've made lasagna, welsh cakes, soup and the following extra special treats...

I had some friends round for brunch over the weekend, for which I attempted Challah bread, a fantastic Jewish egg bread that makes really nice french toast. The Smitten Kitchen recipe makes 2 loaves, so I made one large one for the french toast, one small one for myself, and then used the rest of the dough to make cinnamon buns, as I'm on a never ending quest for the best cinnamon buns in the world! I think the challah dough is actually the top contender, so I'm going to make it again and post step by step photos next time.

We also celebrated a friend's birthday on Monday, and I took advantage of our peanut-allergic friend's absence to make these: chocolate peanut butter mini-cakes. These were adapted from another Smitten Kitchen recipe (I love that blog!), but instead of making the triple layer cake I made a dozen small cupcakes, trimmed the tops to make them flat and then sandwiched them around the peanut butter cream cheese frosting. It worked out really well! And because the cake was rather rich, it ended up being the perfect amount - I wouldn't have wanted any more in one serving.

Up next, baking a cake for the retirement party of our department secretary...I still haven't decided what to make, but I'm debating at the moment between a Russian Honey Cake and a Honey and Lime cake...

February Wrap Up

February was a busy but excellent month for me, especially as it ended with a trip to Portugal! Officially I was there for research reasons, meeting some other researchers in Coimbra and Porto, touring some labs and trying to figure out if there would be any opportunities for collaborating in the future. And while I'm still not sure if I'll be able to get to work in Portugal during my PhD, I met some great people and realized that until now I have never seen a well-equipped soils lab! It was so good to meet some Soil Scientists and hear about the work they're doing, and it's made me think a bit more about what I want to do afterwards. We'll see...

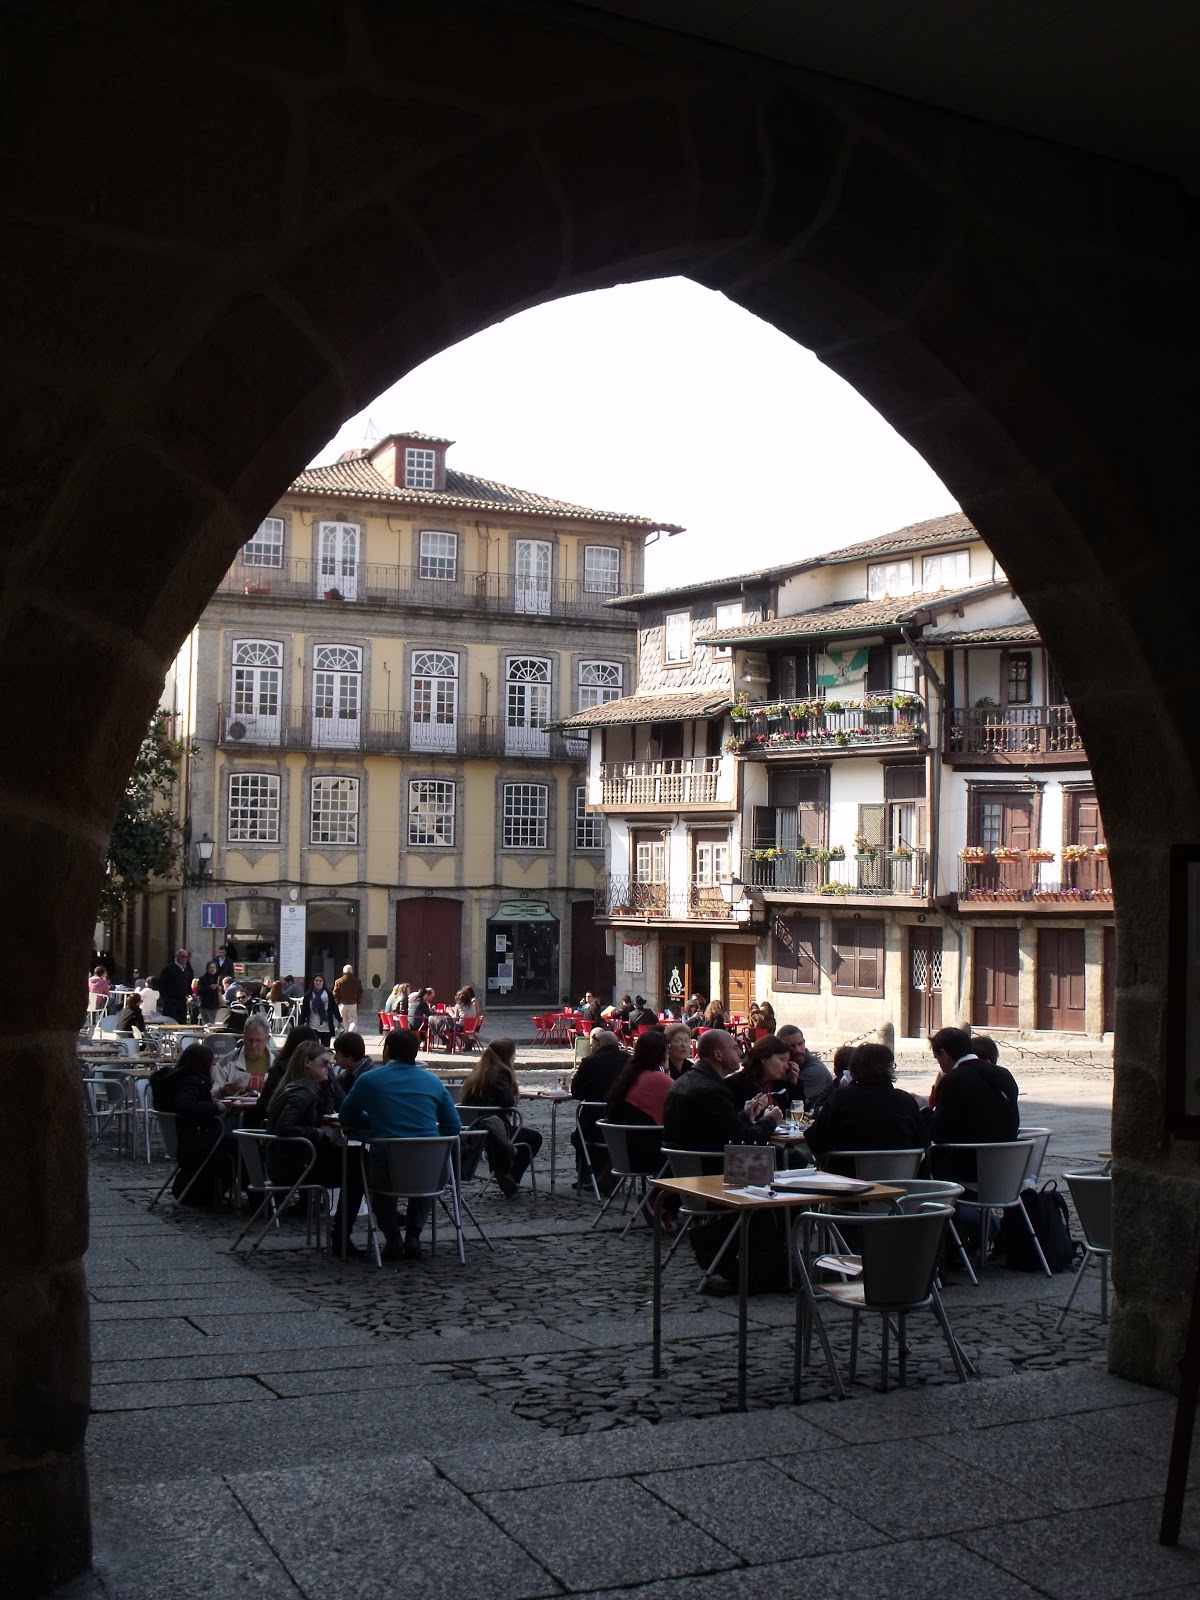
Of course I managed to fit in a bit of being a tourist as well, and the last two days of my trip were in a town called Guimaraes (North Central Portugal), and they were meeting free and just for fun. All three of the cities were great, but I think my favourite was Porto.

I'm still enough of a North American to get overly excited by the novelty of going anywhere in Europe (even within the UK). The sight of a 'Porto' stamp in my passport made me inordinately excited. And another highlight - getting to use my very rusty high school French! The taxi driver and hotel receptionist in Guimaraes had no English, so we spoke in French instead, and I was actually able to carry on a whole conversation! It was such a great feeling to have a second language to fall back on - I will never again bemoan my French classes, even if it is Quebec French and not France French. It's still usable! 


So now I'm back in Swansea and trying to sort out the rest of my year...working in Portugal, writing up by December, what to do afterwards...it all seems to be building up right now and it's all still a massive question mark. I'm ok with that, and not too stressed, but I'm beyond curious to see what happens!


Monday, 6 February 2012

Chocolate Roulade

I've been lucky to find friends here who love cooking (and talking about cooking) as much as I do, and we seem to have unintentionally established a tradition of weekly/biweekly dinner parties. It's never anything overly fancy; sometimes one person makes everything, but usually we're each assigned a course to bring. I usually bring desserts or bread, because while I do enjoy cooking, I really love baking, and I like trying out new recipes :)

This week was an extra challenge because one of my friends has had to go temporarily wheat-free, a circumstance that has drawn much sympathy from the rest of us allergy-free, bread-loving gluttons. However, this circumstance also provided me with the ideal opportunity to try out a recipe I'd been curious about for a while: chocolate roulade. Naturally wheat and gluten free!


The Great British Bake Off (I cannot express the extent of my love for this show. It's the only tv contest I can stand watching, mostly because I can empathize with a baker when their bread hasn't risen properly) contestants had a lot of trouble with this cake, and I was expecting many challenges and little success. But! Surprise! Success! And such success! It looked good AND tasted good - I think even Mary Berry would have been proud (which is all I could think of when I was folding in the egg whites). This recipe is very slightly adapted from hers, which you can find here. I think the next time I make it I'm going to crush some raspberries and mix them right into the whipped cream for extra oomph.

On to it then:

Chocolate Roulade
Makes 10 slices (not counting the end bits you'll have to trim off...those are bonus slices for the baker)

175 g good quality dark chocolate
175 g + 1 tsp caster (super fine) sugar
6 eggs, separated
2 tbsp cocoa powder
400 mL double (whipping) cream
1 tsp vanilla
1 tsp icing sugar, for dusting

1. Preheat the oven to 350F / 180C. Grease and line a large rectangular cookie sheet or a jelly roll tin with parchment paper, making sure there's a bit of excess on all sides. Grease all sides of the parchment paper.

2. Break the chocolate into pieces and melt slowly in a glass bowl over a pot of boiling water, stirring frequently. Once the chocolate is completely melted, remove from heat and let cool slightly (should still be runny, just not hot).


3. Beat the egg yolks and 175 g caster sugar together until light in colour, then add the cooled chocolate and stir until well mixed. (Your batter will likely be rather dense at this point).


4. Beat the egg whites until stiff (but not dry and shiny, like meringues). You should be able to tip the bowl over without the egg whites sliding or falling out.


5. Fold one large spoonful of egg whites to the chocolate mixture, and mix until well combined. Then gently fold in the remaining egg whites and sift in the cocoa. (You'll want to be very gentle at this point - the cake batter has no other rising agent, so the fluffiness of the egg whites is the only thing adding height to this cake. If you're over-enthusiastic in your mixing, you'll lose the light airy texture you want in the finished product.)


6. Once all the egg whites have been added, tip the batter into the prepared tin and gently level the surface. Bake in the preheated oven for 15-20 minutes, or until firm to the touch. Once the cake is finished, remove from the oven and let cool for at least a few hours (overnight is fine too) covered in a clean damp tea towel. (Don't let the tea towel touch the surface though - put a cooling rack or something between the tin and the towel.) The cake will likely sink a bit, but don't worry, this is normal!

7. Whip the cream, 1 tsp vanilla and 1 tsp sugar together until stiff.

8. Dust some parchment paper with a bit of cocoa and icing sugar, and when the cake has cooled completely, tip it onto the parchment. (This make take some finagling...I had a bit of a contraption with another icing sugar-dusted baking sheet holding the cake in place as I turned it so it wouldn't fall out and break.) Remove the greased parchment paper.


9. Spread the whipped cream evenly over the cake. Then, using the parchment paper underneath, slowly start to roll the cake into a semi-tight jelly roll. It will crack a bit, but that's okay - it's supposed to!


10. Keep the parchment paper underneath the roll and transfer to a serving dish. Trim off each end to tidy up the look of it. Dust with a bit more icing sugar or cocoa powder and refrigerate until serving (at least 30 minutes). I served this with raspberries, but I think some strawberries and mint would also be really good.